Pilates Shoulder Bridge Exercise: How to Perform It Correctly and Safely
26/12/2025Do you often experience back pain after a long working day? Or are you looking for firmer glutes and a more confident posture? The Pilates Shoulder Bridge exercise may be exactly what you’re looking for.
What Is the Pilates Shoulder Bridge Exercise?
The Pilates Shoulder Bridge exercise is a hip lifting movement that uses the strength of the glutes and core muscles. When performing this exercise, you lie on your back with your knees bent and lift your hips off the mat, creating a straight line from your knees to your shoulders.
Shoulder Bridge is an exercise in the original Pilates sequence of 34 exercises.
This exercise primarily targets the posterior chain, including the glute muscles and hamstrings. It also activates the abdominal muscles (including the transverse abdominis and rectus abdominis) and the spinal extensors. In addition, during the Shoulder Bridge, you may feel a stretch in the quadriceps (front thigh muscles). More advanced variations also engage the hip flexors and obliques.
The Pilates Shoulder Bridge exercise is suitable for all levels, from beginners to experienced practitioners. However, if you have any injuries related to your back, neck, or hips, consult a medical professional before practicing.
Benefits of the Pilates Shoulder Bridge Exercise
The Pilates Shoulder Bridge exercise does more than shape your glutes it offers multiple benefits for overall health. Below are the key advantages:
- Strengthens the core: The core muscles play a vital role in spinal stability and daily movement. Shoulder Bridge strengthens these muscles, helping you build a firm and resilient body.
- Improves posture: Poor posture can lead to back pain, neck tension, and shoulder stiffness. Shoulder Bridge strengthens the muscles supporting the spine, improving posture and reducing related issues.
- Reduces lower back pain: Especially beneficial for office workers or sedentary individuals, this exercise strengthens the lower back muscles, reduces spinal pressure, and alleviates back pain.
- Enhances glute strength: The exercise effectively activates the glutes, helping you achieve firmer and stronger hips.
- Improves hip stability: The hips play a central role in body movement. Shoulder Bridge increases hip stability and reduces the risk of injury.
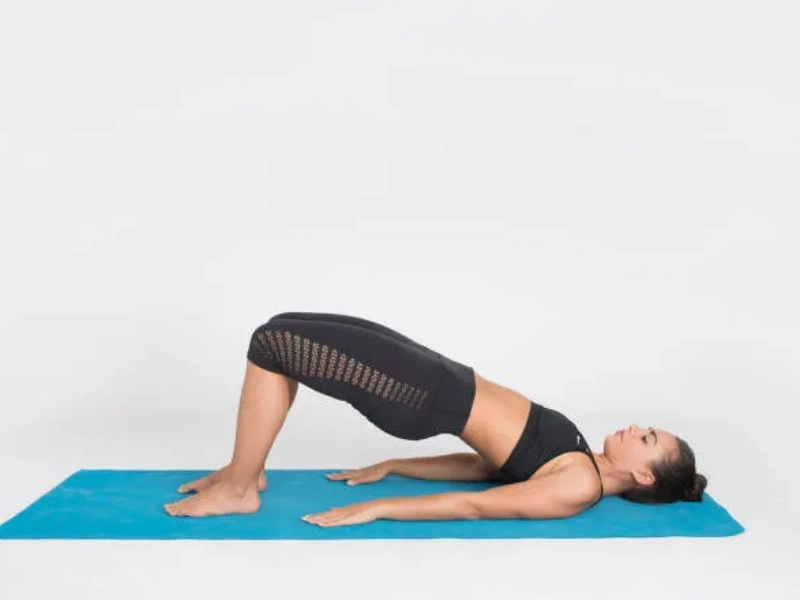
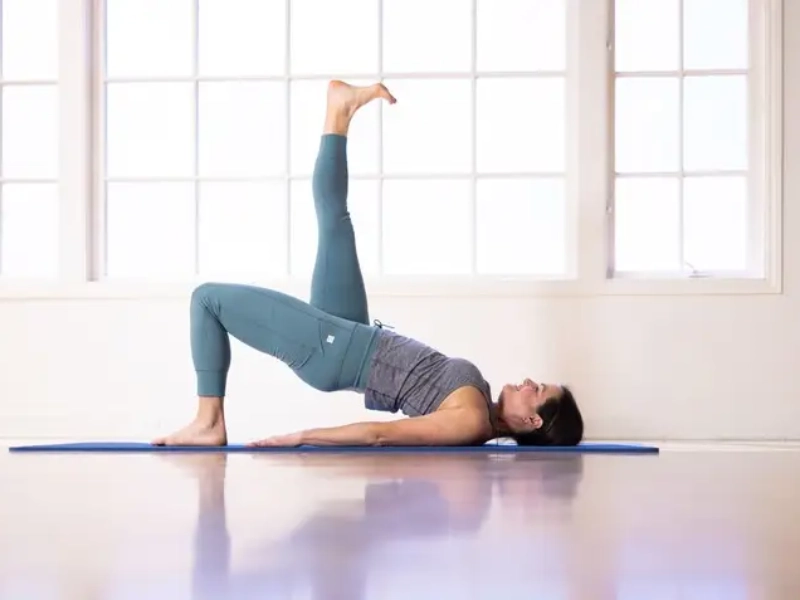
How to Perform the Pilates Shoulder Bridge on the Mat
Follow these steps to perform the Pilates Shoulder Bridge exercise on the mat:
Pilates Shoulder Bridge exercise on the mat.
- Step 1: Lie on your back with knees bent and feet hip width apart. Place your arms alongside your body, palms facing down.
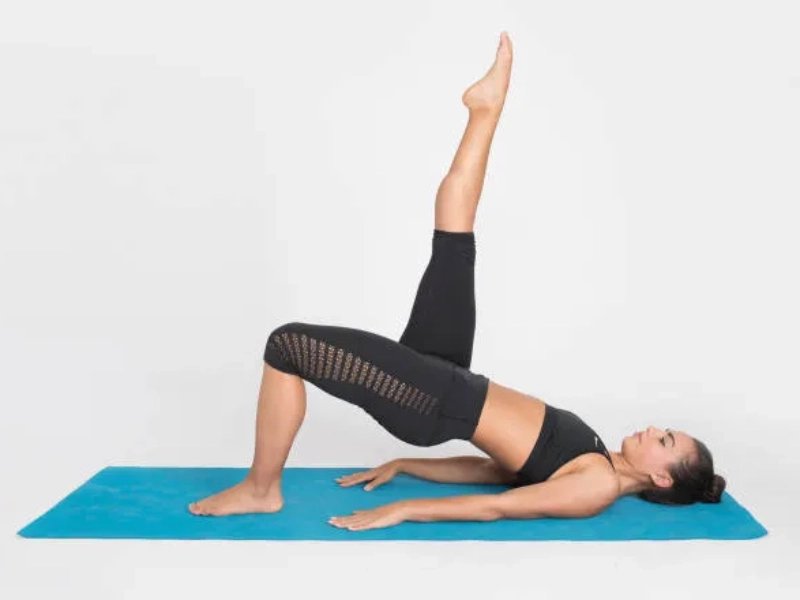
- Step 2: Exhale as you lift your pelvis and hips, forming a diagonal line from your knees to your shoulders.
- Step 3: Extend one leg straight.
- Step 4: Bend the extended leg back and return to the starting position. Repeat and switch sides.
How to Perform the Pilates Shoulder Bridge Using Equipment
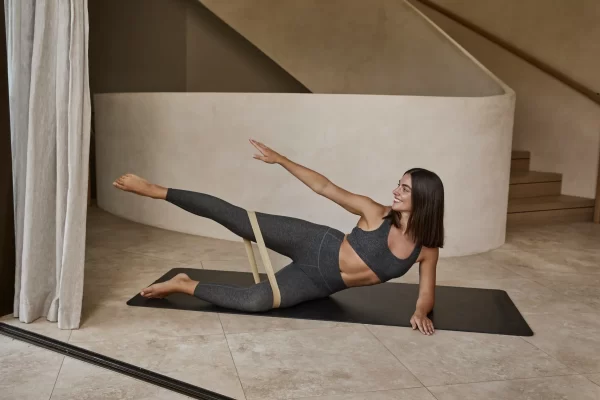
Pilates Shoulder Bridge with Magic Circle
Introduction to Pilates Shoulder Bridge with Magic Circle
The Pilates Shoulder Bridge with Magic Circle is a unique variation that adds challenge and effectiveness. This exercise combines the classic Shoulder Bridge with the Magic Circle an accessory designed to enhance strength and stability.
The Magic Circle (also known as a resistance ring) is made from flexible material with padded handles on both sides. When combined with the hip lift of the Shoulder Bridge, it helps activate the inner thighs, increases control, and challenges the core more deeply.
This exercise is typically performed on a mat and is suitable for all Pilates levels, from beginners to advanced practitioners.
How to Perform the Pilates Shoulder Bridge with Magic Circle
1. Setup position:
- Lie on your back with knees bent and feet flat on the mat.
- Place the Magic Circle around your thighs, just above the knees.
- Extend your arms alongside your body.
- Keep feet and knees about a fist width apart, aligned with each other.
- Keep your head relaxed on the mat, leaving natural space behind the neck.
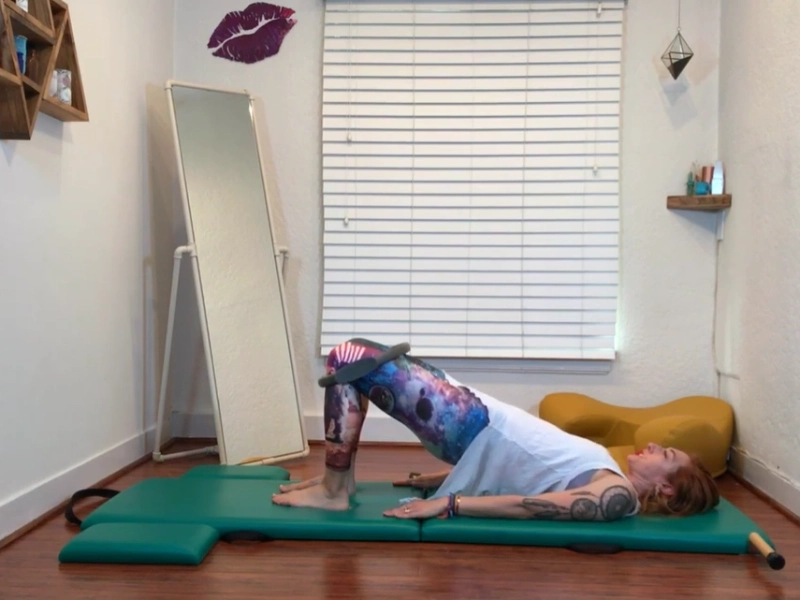
Pilates Shoulder Bridge with Magic Circle.
2. Hip lift:
- Gently press the knees outward into the Magic Circle while engaging the inner thighs.
- Inhale, then exhale and slowly lift your hips off the mat, rolling up one vertebra at a time from the tailbone.
- Form a straight line from shoulders to knees. Keep your gaze toward the ceiling.
3. Lowering down:
- Exhale as you roll the spine down slowly, starting from the upper back to the tailbone.
- Avoid skipping any vertebrae, but do not force the spine into the mat.
4. Repetition:
- Repeat the lift and lower 3-5 times while maintaining gentle pressure on the Magic Circle.
- On the final repetition, hold the hips high and perform 10 small pulses squeezing the Magic Circle.
5. Finish:
Slowly lower your hips, remove the Magic Circle, and progress to a full Shoulder Bridge if desired.
Notes:
- Keep your feet firmly grounded with even weight distribution.
- Breathe steadily; avoid holding your breath.
- If you feel neck tension or back discomfort, reassess your alignment or adjust the Magic Circle.
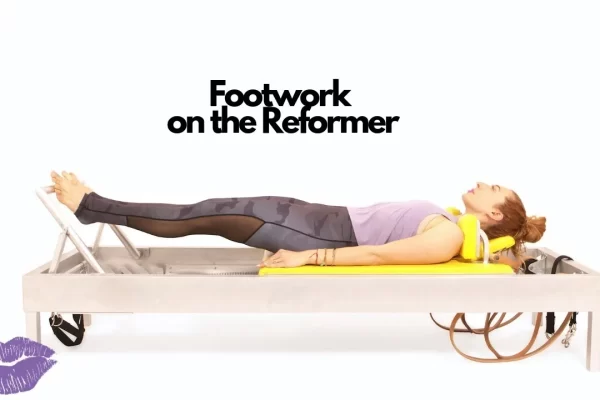
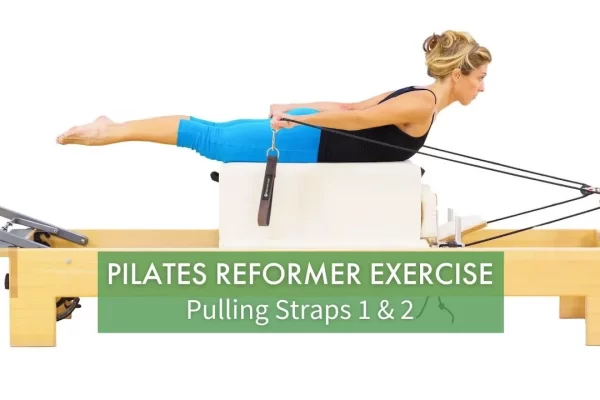
Pilates Shoulder Bridge on the Wunda Chair
Introduction to Pilates Shoulder Bridge on the Wunda Chair
The Pilates Shoulder Bridge on the Wunda Chair is an advanced variation of the traditional exercise. It challenges strength, control, and balance by requiring the practitioner to maintain stability while working on a smaller surface.
This variation significantly enhances body awareness, particularly in the core and lower back.
Step by Step Instructions
Step 1: Preparation
- Attach one spring in the middle position for moderate resistance.
- Lie on your back with your head away from the Wunda Chair and hips close to the pedal.
- Place the arches of your feet on the pedal, knees at a 90-degree angle.
- Arms rest alongside the body with natural space behind the neck.
- Keep feet and knees hip width apart.
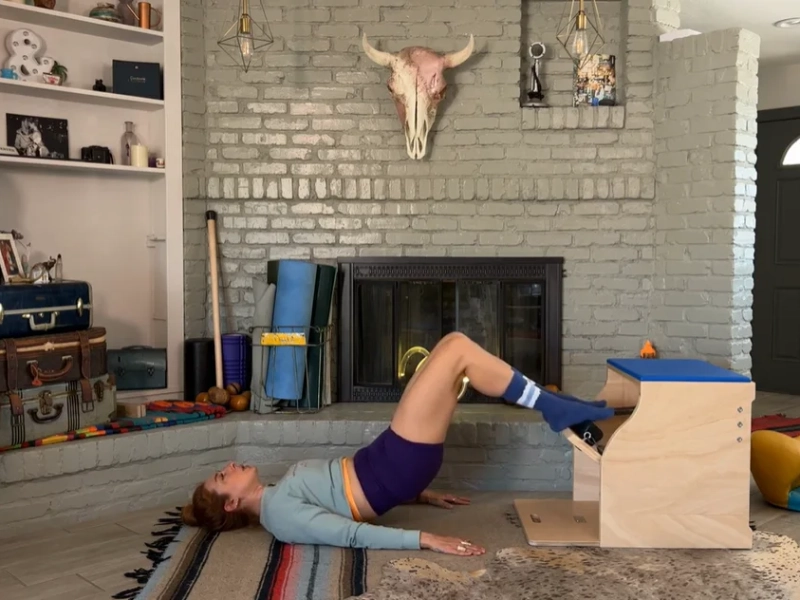
Pilates Shoulder Bridge exercise on the Wunda Chair.
Step 2: Hip lift
- Keep the pedal lifted and raise your hips slowly without changing neck position.
- Roll the hips down, or continue rolling up, pressing the pedal down and releasing it 5–10 times before lowering the hips.
- Repeat 2–3 times.
Step 3: Single leg variation
- Roll hips up and extend one leg off the pedal, keeping the pelvis stable.
- Use the supporting leg to press and release the pedal 5–8 times.
- Switch sides. If one leg is weaker, perform extra repetitions on that side.
Step 4: Completion
After completing both sides, you may link this exercise with the “Table” movement on the Wunda Chair for enhanced control.
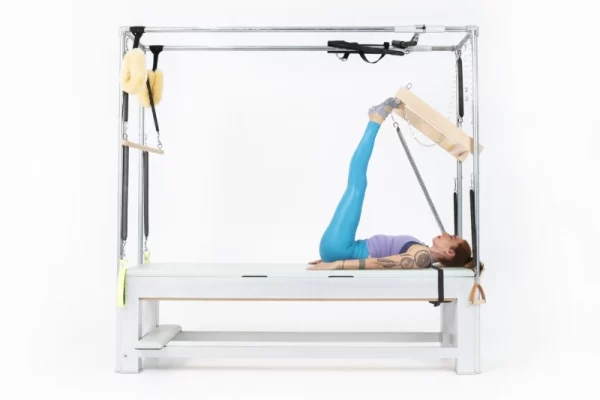
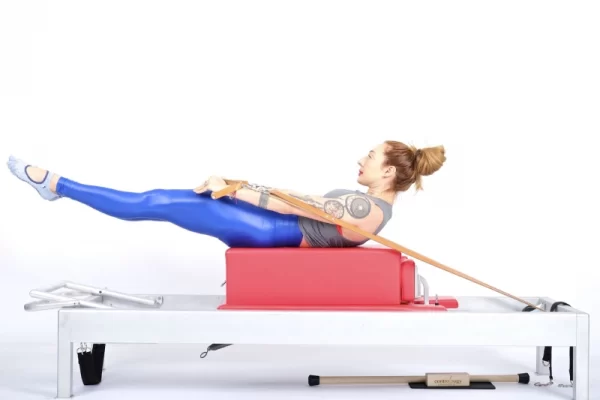
Pilates Shoulder Bridge on the Spine Corrector
Introduction to Pilates Shoulder Bridge on the Spine Corrector
The Spine Corrector is designed to support spinal alignment and flexibility. Performing the Pilates Shoulder Bridge exercise on the Spine Corrector emphasizes spinal lengthening, hamstring and inner thigh engagement, glute activation, chest opening, and back strengthening.
This apparatus provides excellent support and helps identify imbalances between the hips, making it effective for improving symmetry and balance.
Detailed Instructions
Starting position:
- Sit on the curved surface of the Spine Corrector near the step, facing it.
- Hold the handles, place one foot on the step, and extend the other leg.
- Slowly recline until the head and shoulders rest on the floor, with the hips supported at the top of the arc.
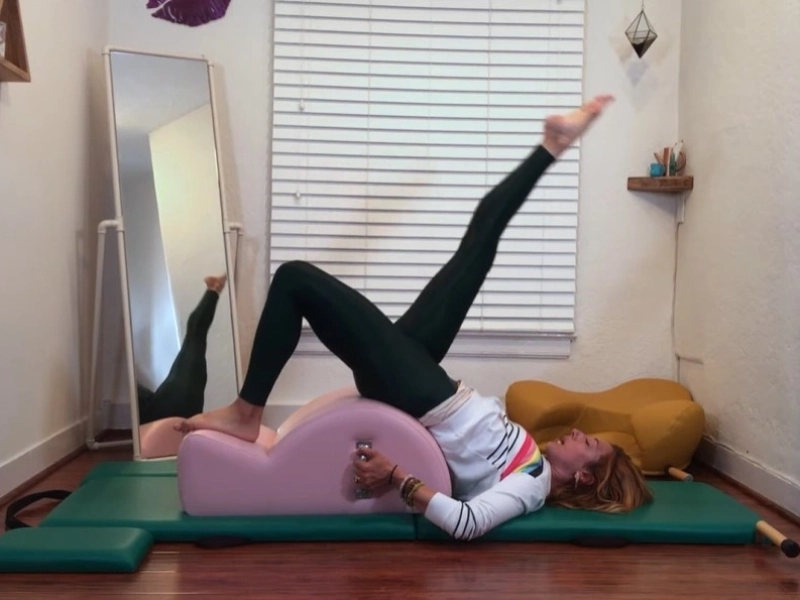
Pilates Shoulder Bridge on the Spine Corrector.
Execution:
- Press both feet into the step to feel a gentle lift of the hips.
- Extend one leg upward, toes pointed, lifting it high.
- Push the leg slightly higher once more.
- Flex the ankle and slowly lower the leg as far as possible while keeping the pelvis stable.
- Repeat: point and kick the leg up twice, then flex and lower. Perform 2–3 sets, then switch sides.
Important Notes When Performing the Pilates Shoulder Bridge Exercise
To achieve the best results and avoid injury, keep the following points in mind:
1. Alignment
- Maintain a neutral spine: Keep a straight line from knees to shoulders. Avoid over arching the back or lifting the hips too high.
- Engage the abdominals: A strong core stabilizes the spine and reduces pressure on the lower back.
- Correct foot placement: Feet should be hip width apart with heels grounded.
During the Pilates Shoulder Bridge exercise, you should pay attention to keeping your back straight.
2. Speed
Perform each movement slowly and with control. Avoid rushing, as this may cause muscle strain or injury.
3. Breathing
Inhale as you lower the hips and exhale as you lift them. Proper breathing enhances relaxation and focus.
4. Repetitions and Rest
Beginners can perform 10–15 repetitions per set with a 30 second rest between sets. Increase repetitions and reduce rest time as your strength improves.
Additional notes:
- Listen to your body and stop if you feel pain.
- Consult a trainer or fitness professional if you are unsure about proper execution.
The Pilates Shoulder Bridge exercise is a fundamental yet highly effective movement for strengthening the core, improving posture, and reducing back pain. By practicing it regularly, you can build a healthier body and feel more confident in your movement and posture.